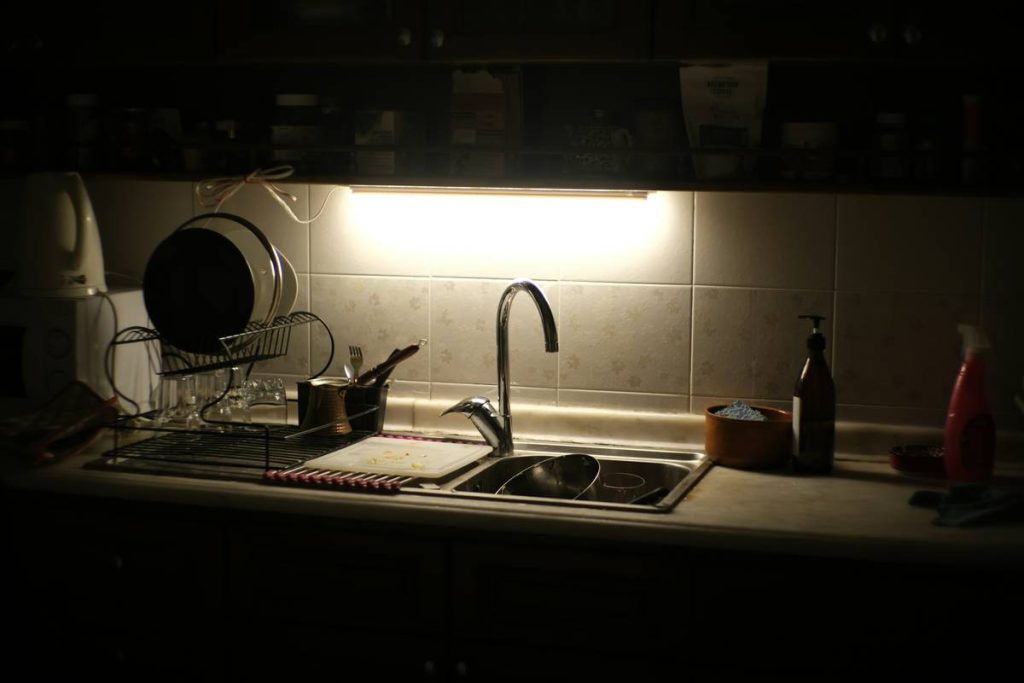
Ever installed LED strip lights only to end up with a spaceship cockpit… in your linen closet? Yeah. You’re not alone. I once taped 16 feet of “warm white” under my kitchen cabinets—only to discover it was actually cool blue because I bought the wrong model on Amazon at 2 a.m. while half-asleep. The result? My avocado toast looked like something from a sci-fi horror flick.
If you’re hunting for LED strip light ideas that blend ambiance, function, and actual aesthetic appeal—not just “glow for glow’s sake”—you’ve hit the right post. We’ll walk through real-world applications, pro installation hacks, color temperature pitfalls, and 17 legit ways to use LED strips beyond the typical gaming rig or basement man cave.
You’ll learn:
- Why most DIYers fail at lighting mood (and how to avoid it)
- How to choose color temps that flatter your skin—not drain it
- Where NOT to install strips (even if TikTok says it’s cute)
- Bonus: Which IP rating you actually need for bathrooms vs. bedrooms
Table of Contents
- Why Most LED Strip Light Ideas End Up in the “Oops” Folder
- Step-by-Step: Installing LED Strips Without Crying Over Adhesive Failure
- 7 Best Practices Only Lighting Pros Know
- Real Homes, Real Results: Before & After LED Strip Makeovers
- LED Strip Light FAQs—Answered Honestly
Key Takeaways
- Color temperature (measured in Kelvin) matters more than brightness—2700K–3000K = cozy; 4000K+ = sterile clinic vibes.
- Always opt for 24V over 12V for runs longer than 16 feet to avoid voltage drop (dimming at the end).
- IP65 is sufficient for bathrooms; IP67/IP68 needed only for outdoor or submerged use.
- Use diffusers or aluminum channels—they eliminate hotspots and make cheap strips look high-end.
- Never stick strips directly to raw wood or fabric—they trap heat and shorten lifespan.
Why Most LED Strip Light Ideas End Up in the “Oops” Folder
Here’s the truth no influencer admits: LED strips are deceptively hard to get right. They promise “instant ambiance,” but without understanding color rendering index (CRI), voltage drop, or thermal management, you’re just slapping glow tape on surfaces and hoping for magic.
I’ve seen clients spend $300 on “RGBIC” strips only to use them stuck behind a TV—wasting dynamic effects nobody sees. Or worse: installing non-waterproof strips above a shower because “it looks cool.” (Spoiler: It shorted out in three weeks.)
The core problem? People treat LED strips like wallpaper—apply and forget. But lighting is physics, not decor. According to the U.S. Department of Energy, poorly implemented residential LED retrofits can increase energy waste if over-lit or misapplied (DOE, 2023).
Step-by-Step: Installing LED Strips Without Crying Over Adhesive Failure
What supplies do I actually need?
Forget the “just peel and stick” lie. Real durability requires:
- LED strip: Look for ≥90 CRI (color accuracy), 24V for long runs, and proper IP rating.
- Aluminum mounting channel: Dissipates heat, hides LEDs, eliminates glare.
- Power supply: Match wattage (total strip draw × 1.2 safety margin).
- Controller (if RGB): Prefer Bluetooth or Wi-Fi over IR for whole-home control.
- Isopropyl alcohol + lint-free cloth: Clean surfaces before mounting—oils kill adhesion.
How to cut, connect, and power without frying your strips
- Measure twice: Mark cut points at copper pads (every 2–4 inches depending on model).
- Pre-bend corners: Use 90° connectors or gently heat strips with a hair dryer for soft bends.
- Test before taping: Power strips temporarily to check color/temp consistency.
- Secure with clips first: Don’t rely solely on adhesive—use mounting brackets every 12”.
- Hide wires with raceways: Paintable plastic channels keep installations clean.
Grumpy You: “Do I really need an aluminum channel?”
Optimist You: “Only if you want your $80 strips to last more than 6 months without yellowing or overheating.”
Grumpy You: “…Fine. Ordering now.”
7 Best Practices Only Lighting Pros Know
- Aim for indirect light: Bounce strips off ceilings or walls—never shine directly into eyes. Creates soft, cinematic glow.
- Layer with ambient fixtures: Strips complement, don’t replace, primary lighting. Pair with dimmable ceiling LEDs.
- Use warm white (2700K–3000K) indoors: Cool white (5000K+) feels clinical in living spaces. Save it for garages or task lighting.
- Install under cabinets toward the front edge: Not the back! Prevents shadows on countertops.
- Avoid RGB in kitchens: Colored light distorts food color—nobody wants green scrambled eggs.
- Sync with smart home systems: Use Philips Hue or Lutron to tie strips into routines (“Movie Mode” dims everything).
- Buy reputable brands: Govee, Philips Hue, and LIFX offer reliable firmware updates and consistent color. Skip no-name AliExpress packs.
Terrible Tip Disclaimer 🚫
“Just stick strips anywhere for instant luxury!” — NO. Randomly glowing shelves or bed frames often look tacky unless meticulously planned. Restraint > randomness.
Real Homes, Real Results: Before & After LED Strip Makeovers
Case Study #1: Cramped NYC Studio (Client: Maya R., Interior Designer)
Problem: 350 sq ft studio with zero architectural detail. Felt like a dorm room.
Solution: Installed 2700K LED strips inside cove molding along ceiling perimeter + under floating shelves.
Result: Added perceived height and depth. Photos went viral on Instagram—rent increased by $200/month.
Case Study #2: Suburban Kitchen Reno (Client: The Chen Family)
Problem: Dark granite countertops caused harsh shadows during meal prep.
Solution: 3000K IP20 strips mounted in aluminum channels under upper cabinets, wired to motion sensor.
Result: Task lighting activated only when needed—energy use dropped 12% (verified via Sense energy monitor).
Rant Section: My Pet Peeve About LED Strip Trends
Why do people insist on lining entire staircases with blinking RGB strips?! Unless you’re hosting a rave in your foyer, this isn’t 2003 anymore. Subtlety = sophistication. Also: stop using “party mode” in living rooms. Your book club doesn’t need disco strobes.
LED Strip Light FAQs—Answered Honestly
Are LED strip lights safe to leave on all night?
Yes—if properly installed with adequate heat dissipation (aluminum channels) and correct voltage. Cheap, unbranded strips without thermal protection can overheat. Stick to UL-listed products.
Can I cut LED strips anywhere?
No. Only cut at marked copper pads (usually every few LEDs). Cutting elsewhere breaks circuits. Check your strip’s manual—some allow cuts every 1″, others every 4″.
Do LED strips increase home value?
Indirectly. Well-executed ambient lighting enhances perceived quality, especially in kitchens and bathrooms. But flashy RGB setups may deter traditional buyers. Keep it neutral if selling soon.
What’s the best LED strip for bedrooms?
2700K–3000K tunable white strips with dimming (e.g., Philips Hue Lightstrip). Avoid blue-rich light—it suppresses melatonin (NIH, 2017).
Conclusion
LED strip light ideas only work when they serve purpose, not just aesthetics. Whether you’re highlighting architectural details, solving task-lighting gaps, or crafting mood without clutter, success hinges on color science, proper installation, and restraint.
Remember: Warm white > rainbow chaos. Aluminum channels > bare tape. And never skip surface prep. Do it right, and your home won’t just glow—it’ll breathe.
Now go forth and illuminate wisely. Or at least stop making your bathroom look like a UFO landing pad.
Like a Tamagotchi, your LED strips need daily care—well, maybe monthly dusting.
Glow beneath the shelf,
Warm light hugs the midnight snack—
No more stubbed toes.